Have you ever wondered how it’s possible to get the edges of your leather projects super smooth and even? What’s the best method used to achieve these slick leather edges? This process is crucial to improving the look of your leather work projects as it helps give them a more professional finish. In order to get rid of frayed uneven edges you need to rub them or burnish them with an edge slicker. In this post i will discuss Edge burnishing leather with tips and tricks to help you improve.
Leather edge burnishing is another term for making your leather edges smooth and glossy by rubbing them with Beeswax and a timber/ plastic tool called an edge slicker in order to build up friction/ heat to create smooth neat edges.
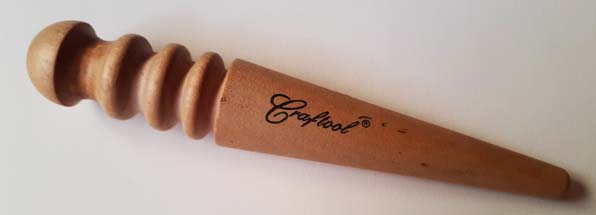
What is and edge slicker
An edge slicker is a round piece of timber or plastic with grooves in it that is rubbed along a leather edge to build up friction. The friction compresses the leather fibres on the edge and makes them shiny, clean and smooth.
Why do you need to burnish your edges?
When i first started working with leather, the edges of my projects looked frayed, untidy and unfinished. It was quite frustrating as i wasn’t sure what i was doing wrong. After a quick search on the internet i found a few helpful articles and videos on how to improve your leather edges. What tools are used for burnishing and how to burnish. Below is an outline of the tools/ methods that are required for creating better leather edges. Even the most basic technique below (sandpaper and water) improved my leather edges.
What tools are required to burnish leather edges?
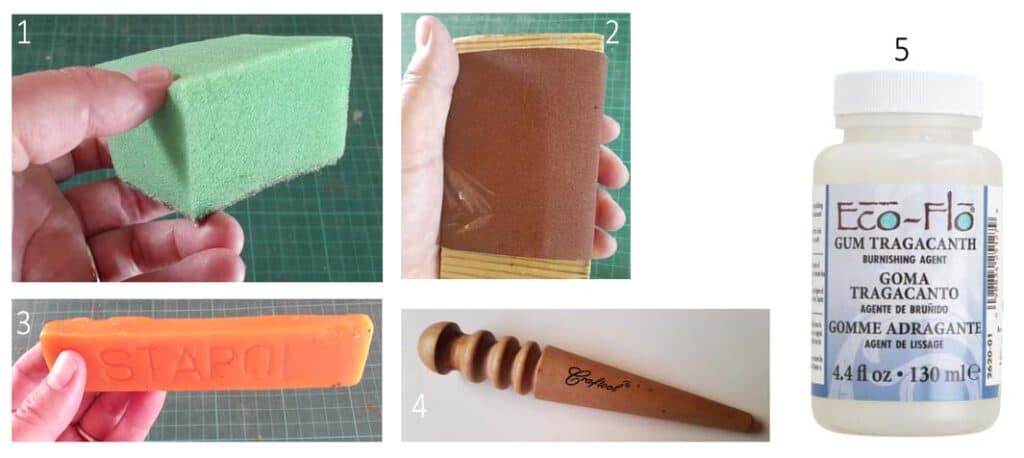
There are 3 different methods to burnishing your edges, but the most important tools you will need are an Edge beveller (optional), a sponge to dampen the leather edges, sandpaper, a timber slicker to rub the leather edges and build up friction, bees wax to help with the rubbing and if absolutely necessary Gum Tragacanth.
- Sponge
- Sandpaper
- timber or plastic edge burnisher or slicker
- Beeswax
- Gum Tragacanth (optional but does give a shinier edge)
- Edge beveller tool (optional)
Gum tragacanth or Gum trag is only necessary for method 3 of burnishing. You could just use the bees wax as it also gives you a good shiny smooth edge.
What is Gum tragacanth? It’s a natural gum extracted from the dried sap of a certain species of middle eastern legume or which Iran is the biggest producer. It is odourless and tasteless and has amazing water absorbing properties. It’s often used in incense, or as a stabilizer, emulsifier and thickener.
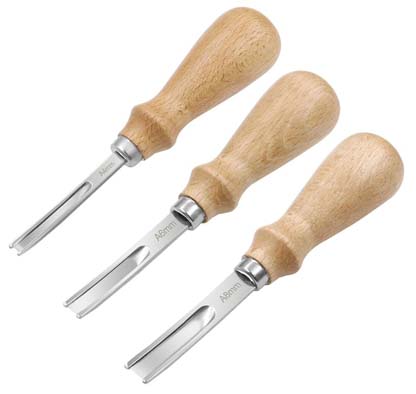
Just a quick side note about the edge beveler tool and what it’s used for. An edge beveler is a tool that will help round the edges of your leather instead of the straight harsh edge you get when you cut your leather with a cutting knife. A beveler definitely helps make a better edge and it is worth investing in one if you are serious about your leather work. They are not too expensive. Here is a link to my article i wrote on edge bevellers that you can check out.
Various methods of burnishing your leather edges.
Method 1, the Water Burnish.
Tools that are required for this method are: sandpaper, edge beveller, water, a sponge and edge slicker. First dampen the edge of your leather with a water soaked sponge. Next begin sanding the edge lightly until you get rid of the frayed edge fibres. Repeat the process as many times as necessary.
Lastly you can apply some leather edge paint that matches the colour of your leather to your edge to finish it off. You can use and ear bud to apply the edge paint to the edges. Allow sufficient time for the edge paint to dry. It normally only takes about 2 minutes to dry.
A note about sanding your edges and why it’s important: If you have 2 or 3 pieces of leather stitched together and one piece is slightly larger than the other you will not get a clean neat edge when you stitch your leather together. Sanding these overlapping edges down will help create a neat flush leather edge.
Method 2, the Wax Burnish.
The tools you will need for this method are: sandpaper, water, sponge, edge beveller and some beeswax and an edge slicker. Repeat the same steps as with the previous method: Dampen the edges slightly and then sand them smooth with a fine sandpaper. Now use your edge slicker to rub the edges smooth. Once that is done we will take it one step further and add some beeswax to the edge.
Then use your edge slicker once again to burnish/ rub your edges. You need to rub quite fast in order to build up heat/ friction on the edge. Remember you can only rub/ burnish a maximum length of about 25cm at a time with your slicker otherwise the heat/friction will not build up sufficiently.
Remember: Do it in stages if necessary and take your time. You can apply the wax a number of times and repeat this process until you are satisfied with the edge. Lastly you can apply a suitable colour edge paint to your edge to finish it off.
Method 3,the Gum Tragacanth Burnish.
The same tools are required as used in method 2 except that you will be using Gum Tragacanth (or Gum Trag as its sometimes called) instead of bees wax on the edges. Gum Trag can be purchased at any leather goods supply store. Here’s a link to Amazon if you would like to purchase some. The Gum trag method can be used after the water burnish method or instead of it. The first step once you have done all the sanding and edge bevelling etc. is to apply some gum Trag to your edge. Then use your edge slicker and rub it along this edge in order to build up friction (max length 25cm). Repeat this process 3 or 4 times to create a nice smooth finish.
Important note: Allow the Gum Trag sufficient time to dry. Important note: Dye your leather before any Gum Trag is added to your leather edge. If it’s dyed afterwards the dye will not adhere properly to the edges of your leather.
How long will burnishing take?
Burnishing time can vary depending on the method of burnish and what item you are making. A leather wallet will have less edges to burnish than a belt. A wallet could be as quick as half an hour to burnish. A belt on the other hand has a lot more edge to it and therefore the burnishing will take much longer, especially as you can only burnish a maximum of 25cm of leather edge at a time. A belt can take easily 2-3 hours if you are burnishing by hand.
Conclusion
Burnishing or smoothing your leather edges will help you create better looking, more desirable leather items. The edges of your leather project are just as important as any other side or face of your leather and should be treated with just as much care and attention.
The burnishing process will help eliminate any flaws and inaccuracies on your leather edges. In the picture/video above you can see the difference between the belt edge that has been burnished and the one that hasn’t. A burnished edge looks more refined and appealing than the unburnished edge. Hope this post was helpful and good luck with your leatherwork!!