Recently, while trawling the net I came across the term Pyrography – having never seen the word before I did some further digging to find out a bit more about this leather technique. For those of you who don’t know what Pyrography is – it’s the art of burning designs into a leather or wood surface. I’ve always enjoyed sketching/ drawing and was amazed at the level of detail that could be achieved by burning leather.
Pyrography is the Art of burning patterns, pictures, designs and words into a surface with the aid of a heated rod or electric pen with a pointed heated nib. The heated pen is moved across the leather or timber surface using varying amounts of pressure causing the surface to scorch or burn.
Pyrography is also known as pokerwork, pyrogravure or wood burning and can be practised on a variety of surfaces, but is mainly used on wood and leather. The Ancient Chinese referred to Pyrography as fire needle embroidery. There is evidence that ancient civilizations like Rome and Egypt also practised a version of pyrography using a heated rod or poker. Hopefully this post will give you some good insight into this beautiful art form. Read on to see what its all about.
What tools and materials are required for Pyrography.
If you are a beginner the following tools and materials are required for pyrography:
- Vegetable Tanned leather
- Water & cotton cloth
- Tool for burnishing the leather (can be a smooth glass or wood)
- Pencil or pen
- Tracing paper
- Adhesive tape
- Picture or design
- Pyrography Pen
- Vegetable Tanned Leather: Only Vegetable tanned leather should be used for Leather Pyrography. Veg tanned leather is tanned only using natural non toxic materials and therefore won’t release poisonous toxins when burnt.
- Chromium tanned leather is not recommended to be used as toxic chemicals are used during the tanning process. These toxins will be released and inhaled when the leather is scorched/ burnt.
- Leather Thickness: Its important to use leather that is thick enough so it doesn’t tear or warp when heat is applied. Leather from 3.5 – 4 ounces is sufficient for Pyrography.
- Water & cotton cloth: Your leather needs to be dampened with a cloth before you begin tracing your design or burning your leather. Both sides of the leather must be dampened as this helps firm up the leather surface. Allow the leather to dry properly before continuing with the next step.
- Burnishing Tool: For those of you who don’t know what burnishing is check out my post on edge burnishing. Basically burnishing leather means smoothing/ polishing the leather surface. You don’t need a special tool – you can use a glass or smooth piece of timber or plastic which is rubbed over the leather smoothing and firming it as you rub. Both sides of the leather need to be burnished as this will give you a good clean surface to burn.
- Pencil, Tracing paper and adhesive tape: Ok so you have the option of drawing freehand directly onto your leather with a pencil. I would only recommend this method if you are artistically inclined or have previous experience in Pyrography. Pencil marks can be erased from the leather should you make a mistake.
- The next option is to use Tracing paper to transfer your design onto your leather. It’s a bit of a process as you first need to trace your design onto tracing paper. You then need to reverse the tracing and trace the design onto your leather so that its not mirrored on the leather surface. Carbon paper is also an option but this can leave unsightly marks on your leather. Use the adhesive tape to keep the tracing paper in place when transferring your design. Make sure the tape doesn’t mark your leather.
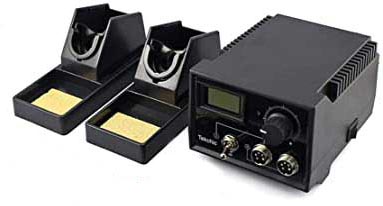
- Pyrography Pen: There are a wide variety of Pyrography pens and kits available online and at craft stores. If you are a beginner you could go with a very basic kit to get you started. The kits usually come with a pen and pen holder. A heating device as well as a few different pen nibs and sometimes some stencils or patterns. If you are more experienced you will know exactly what you need to get the results that you want.
It does help to have some spare leather to practice on so you can get used to the feel of the pen – especially if its your first time. It takes some getting used to.
Types of Pyrography pens
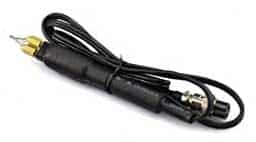
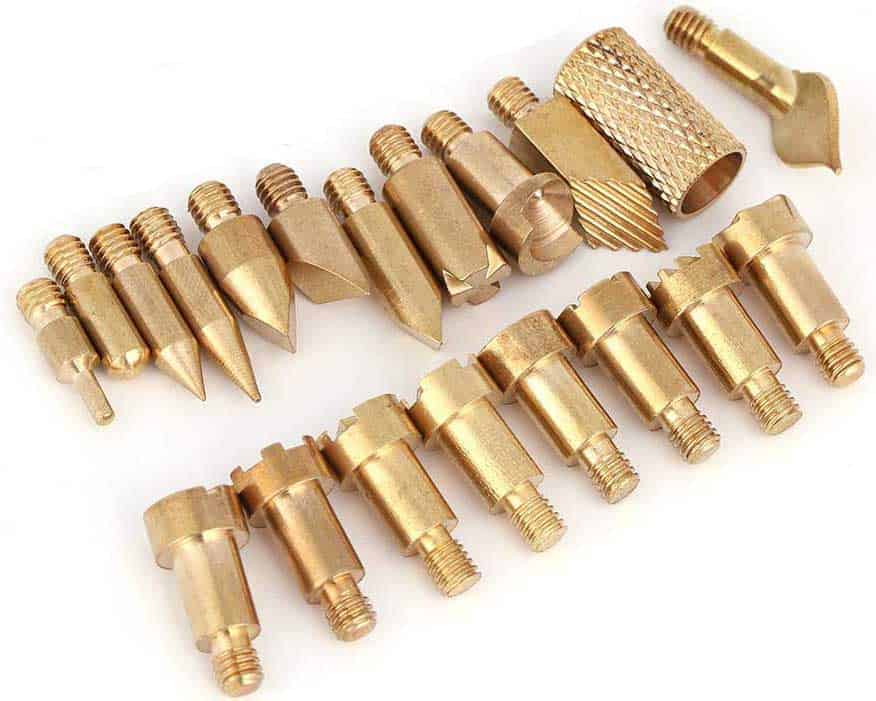
There are 2 basic types of Pyrography pen that are available. Some pens come with a wire tip/ nib and are called wire nib burners. The other type of pen has a solid tip/ nib and these are called solid point burners. Each pen has its own advantages and disadvantages so care needs to be taken when purchasing a pen kit. Lets take a look at the benefits of the 2 different pen types:
Solid point Burner
| Advantages | Disadvantages |
| Usually cheaper price for beginners | Long waiting period for nibs to cool down before you can change them |
| Good selection of different types of nibs & shapes | Hands are far away from the work surface which affects pen control |
| Easy to unscrew & change pen nibs if required | Brass nibs can become softer when heated which can distort the nib & cause damage to them |
| Pen nibs are usually made of brass retains heat for longer periods | Longer waiting periods for pen & tips to heat up |
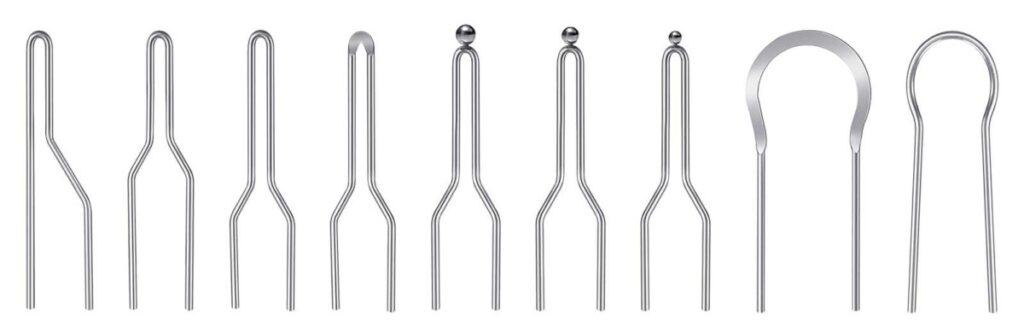
Wire Nib burner
| Advantages | Disadvantages |
| Wide selection of different nibs | Much more expensive than solid point burners |
| Pen is much lighter & more compact than solid point burner pen | Variety of different nibs is limited |
| Hands are much closer to your work surface giving better control | Skill is required to learn to use the correct temperature setting when burning |
| Easy to insert or change nibs as they cool down quickly & heat up faster | Power supply is separate from pen |
The pens, whether solid point or wire nib burner both come with a variety of different shaped nibs that can be swapped should you want a different line style. The nibs can easily be unscrewed and replaced with a different nib. Care needs to be taken that the nib has cooled sufficiently before touching or removing them.
Wire nib burners usually come with an independent power supply and a variable temperature setting which you can adjust by turning a dial to decrease or increase the temperature. This is very handy when working with leather as low temperatures are usually required.
How much do Pyrography pens cost.
The prices of pens kits vary as some kits come with extra nibs, a pen holder, thermostat for temperature adjustment etc. If you are just starting out it might be best to go with a cheaper pen at first, just to see if you enjoy it. If you find that you are loving Pyrography you can consider buying a more expensive kit at a later stage.
Prices range from as little as $20 to as much as $300 so there really is plenty to choose from depending on your skill level and specific requirements. There is a big difference in pen quality so do your research before buying one.
Pyrography pens are available on Amazon or at Tandy Leather and various other craft stores. I would recommend first watching a few videos on Pyrography before purchasing your own pen. It will give you a better idea of what requirements to look out for. Here is a really short video showing the basics of Pyrography.
Helpful tips when using a Pyrography pen.
Allow your pen to heat up adequately before using it. Pyro pens for leather are the same as the pens used for burning on wood. Your pen needs to be set on its lowest temperature setting when working with leather. Learning to use and adjust the temperature settings correctly will take some practice.
Work slowly and methodically. Make sure to keep your hands away from the hot tip.
Use the pen stand provided when the pen is not being used. Also very important to remember and very easy to forget. These pens heat up fairly quickly to temperatures over 750 degrees Celsius and can easily start a fire if placed on a table cloth or carpet. Always use the pen stand provided when not using the pen.
Always make sure the tips/ nibs of your pens are cleaned properly and well maintained. Some kits come with a handy pen cleaning brush or cloth. Clean you nibs regularly in order avoid poor quality lines.
Never remove the tip/ nib of the pen with your fingers if the nib is still hot. You will definitely burn your fingers.
Use the correct pressure when using the pyro pen. The harder you push on your surface the wider and deeper your line will be. A soft touch is necessary for a thinner smoother line. Pressing down lightly with the pen will give you fine even lines which you can go over at a later stage.
Speed of moving the pen also affects the width and line style. The quicker you move your pen across the leather the smoother and thinner your line will be. Vary your speed to get a variety of line styles.
Keep stored safely away and out of reach of small children.
What are Pyrography Stencils or patterns.
Stencils can be bought from various craft stores or leather supply stores. These come with a variety of basic designs that you can use repeatedly to add that personal touch to your project. They are usually made of steel and are used to trace/burn letters or lines into your leather.
Is it safe for Children to use a Pyrography pen.
Children under the age of 13 should always be accompanied by an adult when using a Pyrography pen. A demonstration on how to use the pen safely should be given before they use it on their own. Make sure to highlight the dangers and also the correct operating procedures.
Accidents can happen very quickly and its important that the pen is switched off and placed in its pen holder or stand when not in use. This will keep it from burning you, papers, tracing or your desk. It’s a good idea to keep your pen locked away somewhere safe when its not in use.
Conclusion
The art of Pyrography can be traced back thousands of years. Intricate letters and patterns will help add that little extra detail to your projects. It really is a fantastic technique that should be explored by anyone who enjoys detailed design and drawing work. Good Luck and don’t forget to check out some of my other posts on my blog.